Posted on

Seed Germination Testing at Home

Seed Germination Testing at Home

Are you saving your own seed and wonder if they are viable? Or, do you have seeds stored from one year to the next and wonder if you need to save or purchase more? Here is how you can test for germination using household supplies!

You will need to reference this Guideline sheet for specific crops: Specific Guidelines for Home Germination

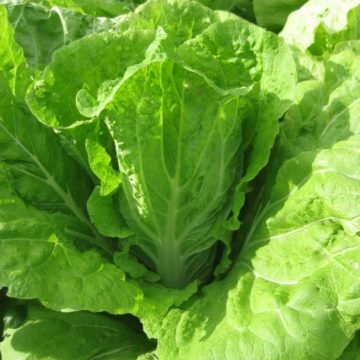
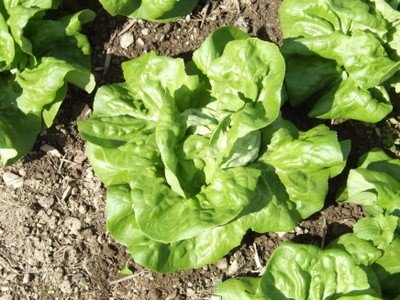
Germination Testing at Home: Small Seed

Materials:

  • flat-bottomed Tupperware container with lid OR sealed quart-size, plastic bag & small plate
  • 2 unbleached coffee filters
  • spray bottle with filtered water
  • 50 seeds
  • tweezers (optional)
  • popsicle sticks and pencil
  • masking tape

Process:

  1. Prepare labels for your seed test by writing the seed variety name, number of seeds in your test, and the date (that you are beginning the test) in pencil on a popsicle stick.  You can reuse your popsicle stick for future tests by erasing this information and updating it.

EXAMPLE OF TEST LABEL TEXT (what you would write on your popsicle stick)

Lettuce – variety: Kalura

Test started on: August 21, 2017

# of seeds: 50 seeds

# of germinated seeds each day: 20 + 17 + 8

# of germinated seeds at end of test: 45

2. Soak the coffee filters in filtered water.  They should be dripping with water.

3. See “Specific Guidelines by Seed Type for Home Germination Test” to determine whether seeds go between coffee filters or on top of a stack of two coffee filters.  Place wet coffee filters on a plate or Tupperware container, then place seeds evenly apart on coffee filter (tweezers can be helpful).  *The important thing is to lay seeds out in an organized fashion so that no seeds touch one another.  We suggest a 5×10 grid of seeds if space allows.

4. Cover seeds with Tupperware lid, or gently place plate in a sealed plastic bag (Ziploc is advised).  Tape popsicle stick label to plastic bag/Tupperware (tape the popsicle stick in a place where it will not interrupt the growth of the seeds).

5. Place seed test in temperature-appropriate conditions (see “Specific Guidelines by Seed Type for Home Germination Test”).  Each day check the coffee filter to ensure that it has not dried out.  If it has, gently moisten it with a spray bottle.  Reference “Specific Guidelines by Seed Type for Home Germination Test” to determine when you should begin checking the seeds to see if they have germinated.  Once seeds have sprouted remove them from your test, but record the number of newly sprouted seeds on the back of your popsicle stick.

6. Reference “Specific Guidelines by Seed Type for Home Germination Test” to determine when to end your germination test.  When it is finished, calculate the germination rate by totaling the number of seeds that had germinated during the test.  Divide this number by 50 and multiply by 100 percent.

Germination Testing at Home:

Larger Seed (Cucumbers, Squash, Beans, Peas, Melon &Corn)

 Materials:

  • sealed quart-size, plastic bag
  • 2 rubber bands
  • small, flat-bottomed dish (mug = fine)
  • 1 grocery brown paper bag
  • scissors
  • 50 seeds, if possible
  • popsicle stick and pencil
  • spray bottle with filtered water

Process:

  1.  Prepare labels for your seed test by writing the seed variety name, number of seeds in your test, and the date (that you are beginning the test) in pencil on a popsicle stick.  You can reuse your popsicle stick for future tests by erasing this information and updating it.

EXAMPLE OF SEED LABEL TEXT

Beans– variety: Provider

Test started on: August 21, 2017

# of seeds: 50 seeds

# of germinated seeds each day: 20 + 17 + 8

# of germinated seeds at end of test: 45

  1. Cut front and back panel out of brown paper bag, ending up with two distinct pieces, each approximately 1’x1.5’
  2. Soak brown paper bag sheets in filtered water, one at a time.  Moisten so that they are dripping.  Lay them on a flat surface, one on top of the other.  Fold the top one down in half, so that the bottom is three layers deep and the top is one layer deep.
  3. Place seeds on the top (single) layer in a 5 x 10 grid.  *The important thing is to lay seeds out in an organized fashion so that no seeds touch one another.
  4. Fold bottom up over the top so that there are now 3 layers of brown paper bag covering the seeds.
  5. Gently roll brown paper bag from left to right – don’t wrap it tight, as the seeds need room to sprout.  The final product should resemble a loose cigar.  The top should have four layers of paper, but the bottom should be the folded end to prevent seeds from falling out.  Wrap one rubber band (not too tight!) around the “cigar” and place upright in a plastic bag.  Place your popsicle stick label on top of the plastic bag and wrap another rubber band (still not too tight) around the entire thing and place upright in a small dish or mug in a safe place (reference “Specific Guidelines by Seed Type for Home Germination Test” to determine temperature-appropriate conditions for the specific seed type). Each day check the “cigar” to ensure that it has not dried out.  If it has, gently moisten it with a spray bottle.
  6.  Reference “Specific Guidelines by Seed Type for Home Germination Test” to determine when to begin checking on seeds.  Once seeds have sprouted remove them from your test, but record the number of newly sprouted seeds on the back of your popsicle stick.  When you have finished this, spray the seeds to rehydrate if the brown bag seems dry.  Repeat step number 6 to fold up the test and place in a safe spot to allow seeds to continue to germinate.  Once you begin checking on the seeds, continue doing so every day or every-other day until the conclusion of your test (as determined by Reference “Specific Guidelines by Seed Type for Home Germination Test”).
  7. When your germination test is finished, calculate the germination rate by totaling the number of seeds that had germinated during the test.  Divide this number by 50 and multiply by 100 percent.
Posted on

Planting with the Stella Natura Calendar

Stella Natura 2017

Planting with the Stella Natura Calendar,

An Interview with Turtle Tree Seed

First published in Margaret Roach’s A Way to Garden blog

Though all the meaning and research behind the creation of the calendar may be a lot to grasp, the calendar actually makes gardening easier. Explain.

A: We find that at Turtle Tree, but also for many home and/or beginning gardeners we know, the structure of the calendar can make  it easier to organize one’s time and to make sure nothing gets neglected. The calendar breaks down plants into four groups: the ones we grow for their roots, including things like Kohlrabi, leeks and onions, (which are not strictly roots, but in which we want to bring out a certain “rooty-ness”); plants we grow for their leaves, such as lettuce, spinach, cabbages, arugula, etc. etc.; plants we grow for fruit such as peas, tomatoes, squash, raspberries, apples, etc. anything that produces an edible part after flowering, and of course plants we grow for their flowers. This last category can also include broccoli and cauliflower. Over the course of about any 9 days, there are times to work with each of these four categories, which cover pretty much everything annual and many of the perennials we want to grow in a garden, as well as “off” times for the gardener to rest or catch up on maintenance of equipment.  So if you sow, plant, hoe, weed and harvest your roots on root days, leaves on leaf days, flowers on flower days and fruits on fruit days, then nothing will get neglected or forgotten in the busy heights of the season. We find that nine days is about the maximum amount of time one can go between weeding or hoeing in any given area of the garden. Of course, this is counting on cooperative weather, which we all know is not necessarily something we can do as gardeners—sometimes you just have got to get things done while the sun’s shining!

In biodynamics, do you look at the phases of the moon, or are there other factors being considered in when to plant what (and charted in the Stella Natura calendar)?

A: We do look at phases of the moon, but in her approximately 50 years of research, Maria Thun, on whose work the Stella Natura calendar (and others) is based, found that there was a relationship not just between what phase the moon is in for planting, but also what zodiacal constellation the moon is in front of at any given time. The moon in any given orbit around the earth passes in front of each of the zodiacal constellations in turn. Maria Thun found that roots grew better when planted and tended on days when the moon was in front of constellations that in olden times were seen as relating to the earth element, leaves grew best when tended at times when the moon was in front of constellations once related to water, flower for the “air” constellations, and fruits for the “fire” constellations. There were also times, such as eclipses, conjunctions, and the times when the moon is moving from one constellation to another, that things didn’t grow as well, so these are the “off” times. Maria Thun found that this was related to astronomy, in other words, what one can actually look up and see in the sky on any clear night, not to the astrological zodiacal signs, which are somewhat off from what appears in the night sky.

I see the words “root” and “leaf” and so on on certain days on the calendar, and not on others. Can you explain how plants are grouped in BD thinking, and on the calendar?

A: There is no hard and fast rule about what plant goes into which category—it depends on the use to which the gardener or farmer wants to put that plant: Should it make a large root or rooty lower stem structure? Do we want to encourage leafy growth? Are we aiming for early and prolific flowering, or is fruit formation the most important?  Of course, since fruit formation depends a good flowering, in a pinch one can do some fruit related things on flower days, and since both strong root and leaf formation depend on not bolting soon, one can also be occasionally flexible between these two. This is something that you can play with to some extent. However, most plants we grow are already bred in a certain direction, and this will have a strong effect on how they grow, even if you can’t plant or cultivate them on the “right” day. Also, the season will have a strong effect on the plants—of anything in the sky, the sun has without a doubt the most influence on plant growth, and coming up to the longest days of the year, your arugula will very likely want to bolt, even if you’ve sown, hoed and weeded it on leaf days. Working with the calendar is not a fix-all, but just helps to support the plants to do what they do best.

Is this the same grouping that advises your system of succession sowing as well–what follows what as space comes available in the BD garden or farm rows?

A: Many biodynamic gardeners use the four categories of plants to inform their crop rotation. The garden is then broken up into 5 sections, a root section, a leaf section, a flower section, a fruit section, and a section to rest or be sown with a cover crop. Each year the sections shift, so that at the end of 5 years, each section will have had each crop category once, and can then start over again. This can be a very simple way to organize crop rotation but it’s important to keep in mind that sometimes there are crops in two or more categories that might be from the same family or even species, for instance, crops such as Kohlrabi, (root) Kale (leaf) and Broccoli (flower), and care needs to be taken that these are not planted one after another in the same bed in consecutive years. Each bed should take a break from brassicas (the three mentioned above are all Brassica oleracea) for a minimum of four years before growing them again, since otherwise diseases (clubroot, etc.) can build up and become a problem in the soil. In our rotation at Turtle Tree things are more complex, since we need to keep plants of the same species isolated from one another so that they don’t cross pollinate. This means that we can’t plant all our tomatoes in a “tomato section” but need to spread them out throughout our three gardens, only growing one kind or variety in any area, and we need to keep in mind how tall plants get when they go to seed, and what airflow is needed between crops to keep them healthy. Our crop rotation ends up being a “4-D” puzzle, taking into consideration all 3 dimensions and time as well! Luckily, unless you are doing a lot of seed growing, a simpler rotation is very effective.

Is it just sowing times that are recommended by the calendar markings, or does the same cosmic thinking govern other garden activities related to those crops, like harvesting?

A: Pretty much any gardening activity from sowing and cultivating to pruning and harvesting can make use of the calendar, but for harvesting, there are certain things that should be taken into consideration: if you are harvesting for immediate use or short-term storage, then harvesting on the day relating to the plant you’re working with is fine, but if you’re harvesting for longer term storage, (over a week or two) then choosing a fruit or flower day will almost always be your best bet. Harvesting for longer storage on leaf days can sometimes lead to poorer storage, since things are more watery on those days. And of course the time of day you harvest really effects how well things will store too: leaves and flowers store best when harvested in the mornings before or just barely after the dew is off the plants, roots store best when harvested either early in the morning or later in the evening when things are cooling down, fruits very often should be harvested during the dry part of the day to avoid including excess moisture on the harvest, but then peas are happy to be harvested in the cool times, while beans, squash  and tomatoes much prefer to be harvested when they’re warm and dry, as touching these plants when they are damp can spread disease.

Posted on

Biodynamic Compost: Layer Cake Method

Biodynamic Compost: Layer Cake Method

Preparing good compost is the cornerstone of any good organic or biodynamic garden. Here is one method for smaller home gardens. The “layer cake” or “lasagna” method ensures good composting and balanced decomposition. If you have been gathering kitchen waste and/or grass clippings to compost, this is the time to create a lovely, well-balanced pile to fertilize your garden next fall.

Preparation

You will need to gather a pile of dry, dead plant matter such as stalks, leaves, etc. and one of green garden matter, kitchen waste, and grass trimmings. You can make any size pile, but too small of a pile can have trouble warming up well, so make as large a pile as you are able to with your materials. If you have a lot of dry leaves, it’s good to run over them a few times with a lawn mower, since they will break down more easily if they are in smaller pieces. Make sure that any garden waste you put into your compost pile is not from diseased plants, and minimize weed seeds in your compost by having a separate weed pile. If you are just making a small pile, it may be possible to remove the seed-heads from your weeds and use the stalks and leaves in your “green” pile if they are still green or in your “brown” pile if they have dried down.

Layer Brown and Green Piles

Once you have your two piles, one of kitchen waste, grass clippings, and “green” or wet organic matter (such as plants cleared from the garden for the winter), one of dry or “brown” organic matter (leaves, stalks, etc.) and a shovel or two of garden soil, you can begin. First lay down a rectangle of “brown” matter, ideally about 4ft by 8 ft (or longer if you have lots of material) and about 6 inches deep, with a rim around the edge of about 8 inches deep to form a shallow trough or container. Into this, spread a layer of the “green” matter, about 2-4 inches deep. Sprinkle this with a few handfuls of soil to help encourage microbial life. Add another layer of “brown” matter, again pulling more towards the edges to make a trough, then “green”, soil, and repeat until your pile is about 4 feet tall. End with a “brown” layer to cover the pile.

Make it Biodynamic

If you are making a biodynamic compost pile you will need to have the 6 compost preparations on hand. Make 5 small balls of soil mixed with each of the dry preps. Poke 5 holes in your pile, (the handle of a garden fork or spade works well for this) and put the soil and preparation balls in, one preparation ball per hole, and tamp them down to ensure good contact with the compost pile. Each biodynamic gardener finds for her or himself the spacing and order which he or she feels brings the best influences into the compost, but a simple and basic form is to make a pattern like the 5 on a dice, with Nettles in the middle, and oak bark and chamomile opposite each other and yarrow and dandelion opposite each other. Mix your valerian juice in warm water for twenty minutes creating good vortices first in one direction then the other, and spray or flick the liquid over the pile like a warm blanket for the long winter sleep. Biodynamic preps can be ordered from the Josephine Porter Institute, or check your area for a local BD group that might make them and have some available. Click here for a sketch of the layer cake compost-piles.

Posted on

Sensible Storage for Seeds

Sensible Storage for Seeds

By Ian Robb

Originally printed in the 2012 Turtle Tree Seed Catalog

We are often asked by our customers:

“How do we store left-over seed until the next planting season?” Before answering this question let me tell you how we store our seed here at Turtle Tree. First we make sure the seed is thoroughly dry. Then we pack the seeds in small brown bags or white seed- envelopes. We double- bag to avoid any seed loss through holes or cracks. We close the bags using rubber bands. The seed is now contained but not packed too tightly. Our seed storage room is dark and maintains a temperature all year round of approximately 43°F and a relative humidity of 45%. In short, cold, dark and dry! We do not store our seeds in plastic bags, freezer bags or plastic containers. We do not store our seeds in open jars in a room with fluctuating temperatures and alternating darkness and light. What we are trying to do is to hold the seed in what I call “slumber”, waiting to wake up when planted in soil at the right temperature with the necessary amount of water and light in which to germinate and grow.

Now to answer the question:

You will need to adapt our method to your situation. Do you have a basement that is dry and stays cool all year round? If you do, make sure that your stored seed is protected from insects and animals. If you do not have a cool dry place in the house then probably the refrigerator will have to do. Check the temperature to see if it is around 43°F. I would recommend that you keep the seed in their original packets (if you have to use new bags or packets make sure they are labeled correctly), store them in a dry glass jar with a tight fitting lid. This situation in the refrigerator should create the necessary cold, dark and dry environment.

Wherever you store your seeds, check them occasionally to make sure that they have not become moldy, or damaged by insects or rodents; this will avoid disappointment when sowing time comes around.

I trust that with these simple guidelines you will find your own solutions to successfully store seeds in your home. May I emphasize that correct storage procedures apply to seeds wherever, whenever. For example, if you like to get your seed order in early winter, please make sure that your seeds are properly cared for until sowing time!

Posted on

Considering A Bee Garden

Considering A Bee Garden

By Lisa Millette
Originally printed in the Turtle Tree 2015 Catalog

At Turtle Tree, we are interested in educating the gardening community so that they can grow and care for the earth more effectively and confidently. This spirit of education also encourages the sharing of new (or perhaps long forgotten) tips and experiences fostering open dialogues among gardeners, growers, seed savers, and food enthusiasts.

Black_eyed_susan
Black Eyed Susan

In recent years, supporting the honey bee and providing food sources for our local pollinators has emerged as a topic of importance. We’ve come to realize how much weight rides on the back of our pollinators to get food on our tables. Thus, a common question we’ve been fielding is: “What are good bee plants?”

When planting out an area for bees, it is important to have a diversity of plants that bloom throughout the seasons – some early blooms, mid-season, and late season flowers. Plant swatches of the same type of plant so they can be easily found. Make decisions on what to plant based on how much time and cultivation you would like to put into your pollinator garden.

Bees enjoy many perennial herbs such as Bergamot (Bee balm), hyssop, Echinacea Purpurea (coneflower), sage, chives, and lavender – these plants will come back year after year and provide you and your bees with culinary delight! Crocus, columbine, and lilac, are early blooming perennial flowers loved by bees, while cup plant and sedum bloom in the fall, providing late season nourishment.

Anise hyssop, borage, dill, basil, phacelia, buckwheat, cosmos, foxglove, dahlias and sunflowers make great annual herb and flowers for your bee garden. Buckwheat and phacelia are especially wonderful to include as they are early bloomers and will reseed themselves.

Ever thought about growing your own apples or peaches? Flowering trees or shrubs such as fruit trees bloom in the spring producing much needed early season nutrition for bees.

pollinator garden pack

From squash and cucumber blossoms to tomato and onion flowers, many of the flowers vegetables produce are loved by bees and are necessary for fruit and seed production. Allow members of the brassica family such as arugula, broccoli, or mustard greens to bolt and flower in the fall as they will withstand the first frosts providing pollen long after other flowers have died.

Many wildflowers and “weeds” also produce blossoms that are food for our pollinating friends.  Chicory, black-eyed susans (Rudbeckia), cat mints (such as catnip), clovers, daisy, joe pye weed, goldenrod, and dandelions are just a few. Allowing these to flourish in your yard or at the fence lines of your garden will give the bees added reasons to visit your garden and provide habitat for other beneficial insects as well.

Open-pollinated seed sources are best for pollinator gardens as flowers from hybridized seed will not yield as much pollen. It may go without saying, and just in case: eliminate the use of pesticides, herbicides, or any harsh chemical that might poison bees.

So whether you keep your own bees or want to support native pollinators, add some flowers to your garden or yard this year! Even one container with one type of flowering plant may give that hungry worker bee with enough energy to complete her journey back to the hive.